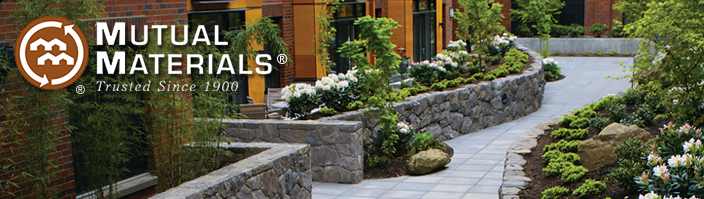
For those of us living in the Northwest, fall is a wonderful time of year. Our weather is generally dry and mild, so it is an excellent time to work on those landscape and home improvement projects that may have been put off during the busy summer months. Imagine enjoying the last remaining warm weekends and evenings entertaining family and friend on a new paver patio. Or you can easily and economically enhance your existing landscape by adding a few natural stone features like boulders and columns. Mutual Materials’ hardscape product lines can provide endless design possibilities. From the simple to the very elaborate, we have the products and sales expertise to help you obtain your desired result.
If you have a fall landscape project that you are considering, feel free to visit one of our 19 Northwest branches for professional help. We’re always happy to send a salesperson out to your home to help you understand which of our products would work best in your house or backyard. If your project is more than “do it yourself”, we have a Preferred Contractor program that makes it easy to find area contractors who are well qualified to do the job. Visit our website to start that process. Have a great fall!
Rob Rosson
Residential Sales Manager
rrosson@mutualmaterials.com
Showing posts with label patio paver. Show all posts
Showing posts with label patio paver. Show all posts
Tuesday, August 25, 2009


Monday, June 29, 2009
Measure twice; Cut twice…maybe three times
In 1988, for Fathers Day, my loving wife gave me a gas barbecue. Of course it was still in the box needing to be assembled, and the extended family was coming over that night for dinner. Needless to say the meat had to be broiled that night and the following three frustrating weeks because the step-by-step instructions were too complicated. Lesson: Buy pre-built when possible.
After mastering barbecue assembly, my next project was to build an attractive brick patio. It was a great idea and something I could work on in my spare time. I even read a book on how to build it before gathering the materials.
I made a series of mistakes in my brick patio installation, including, but not limited to: measuring the area trying to make it so the brick would fit inside the edging I had staked down and deciding to saw cut the bricks to fit the dimensions I’d laid out, rather than adjusting the edging. Two hundred brick cuts later; I managed to end up with a patio that looked good until the next morning when a gopher popped up one of the brick in the middle of the patio. The patio survived until the weight from a tractor broke some of the bricks during our house remodel. When the heavy equipment left I decided to start anew. This time I did it right using lessons I had learned from my past mistakes. And these lessons on creating a beautiful patio I now pass on to you.
Lesson 1: Use the right materials. Road base or 5/8 minus crushed rock provides a great sub-base, unlike pea gravel that does not securely compact. Since I used a crushed rock base, I have never again had gophers disturb pavers. Of course you need to compact and smooth the base with a plate compactor.
Lesson 2: Use real paver edging secured with spikes. The only edging that goes down before pavers are laid is at the starting point. Once you establish where the pavers end you then put the edging butted up against the last course of pavers.
Lesson 3: Prepare base material a foot beyond where you will be laying pavers. Then if you measure incorrectly originally, there is more forgiveness.
Lesson 4: Level just one inch of sand for the paver bedding. Use two pieces of ¾” metal conduit laid on top of the crushed rock as a guide for leveling. Use a 2 x 4 over the conduit to drag (screed) the sand. There is a lot less friction than dragging a 2 x 4 over 2 x 6’s used as guides.
Lesson 5: Level only sand in just the area where pavers are about to be laid. Otherwise overnight critters will ruin your hard work.
Lesson 6: If there are more than a few cuts, rent a saw. The Flintstone hammer and chisel method is ok for cutting a couple pavers, however, the saw is fantastic for multiple cuts or angle cuts.
Lesson 7: Using a contrasting color or texture of paver for the outside edge gives the patio a frame and custom finished look.
Lesson 8: It may be just me; however projects usually take twice the original estimated time. So be sure to take into account when planning.
Lesson 9: If you feel overwhelmed by your project, hire a contractor. Sometimes it’s worth the money to hire a contractor. It's the same as buying pre-built.
Brian Healow
DIY Segment Manager
After mastering barbecue assembly, my next project was to build an attractive brick patio. It was a great idea and something I could work on in my spare time. I even read a book on how to build it before gathering the materials.
I made a series of mistakes in my brick patio installation, including, but not limited to: measuring the area trying to make it so the brick would fit inside the edging I had staked down and deciding to saw cut the bricks to fit the dimensions I’d laid out, rather than adjusting the edging. Two hundred brick cuts later; I managed to end up with a patio that looked good until the next morning when a gopher popped up one of the brick in the middle of the patio. The patio survived until the weight from a tractor broke some of the bricks during our house remodel. When the heavy equipment left I decided to start anew. This time I did it right using lessons I had learned from my past mistakes. And these lessons on creating a beautiful patio I now pass on to you.
Lesson 1: Use the right materials. Road base or 5/8 minus crushed rock provides a great sub-base, unlike pea gravel that does not securely compact. Since I used a crushed rock base, I have never again had gophers disturb pavers. Of course you need to compact and smooth the base with a plate compactor.
Lesson 2: Use real paver edging secured with spikes. The only edging that goes down before pavers are laid is at the starting point. Once you establish where the pavers end you then put the edging butted up against the last course of pavers.
Lesson 3: Prepare base material a foot beyond where you will be laying pavers. Then if you measure incorrectly originally, there is more forgiveness.
Lesson 4: Level just one inch of sand for the paver bedding. Use two pieces of ¾” metal conduit laid on top of the crushed rock as a guide for leveling. Use a 2 x 4 over the conduit to drag (screed) the sand. There is a lot less friction than dragging a 2 x 4 over 2 x 6’s used as guides.
Lesson 5: Level only sand in just the area where pavers are about to be laid. Otherwise overnight critters will ruin your hard work.
Lesson 6: If there are more than a few cuts, rent a saw. The Flintstone hammer and chisel method is ok for cutting a couple pavers, however, the saw is fantastic for multiple cuts or angle cuts.
Lesson 7: Using a contrasting color or texture of paver for the outside edge gives the patio a frame and custom finished look.
Lesson 8: It may be just me; however projects usually take twice the original estimated time. So be sure to take into account when planning.
Lesson 9: If you feel overwhelmed by your project, hire a contractor. Sometimes it’s worth the money to hire a contractor. It's the same as buying pre-built.
Brian Healow
DIY Segment Manager
Subscribe to:
Posts (Atom)